Oxford ICP

Description
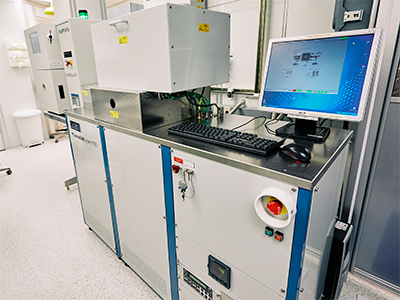
The Oxford Plasma Lab inductively-coupled plasma (ICP) reactive ion etching (RIE) system. The system can etch Si, Si3N4, SiO2, and a variety of metals with good selectivity to standard masking materials. This tool is capable of cryogenic silicon etching, and high aspect ratio deep silicon etching (DRIE/Bosch/DSi, ~5:1).
Process gases:
SF6, C4F8, CHF3, CF4, Ar, O2
This instrument was acquired with support from the National Science Foundation under Grant No. 0722583
Processes
Cryogenic Etch
- Low temperature silicon etch for high aspect ratio features.
Operating Manual
*Note that the instructions below may not contain the most recent updates. Please refer to the manuals printed and posted at the equipment.
This tool is an inductively coupled plasma tool capable of reactive ion etching. These tools are commonly referred to as ICP-RIE systems. Within the chamber exists a large copper coil wrapped around a dielectric (ceramic) cylinder. By applying an RF supply voltage to the coil, the gas contained within the chamber will ionize and create low-pressure plasma. Then, using a separate RF generator, the tool will apply a negative DC bias underneath the substrate. This negative bias attracts the positively charged plasma ions to the substrate. The energy of the ions is large enough to physically sputter target material atoms away (think of a cannonball hitting a pile of gravel). Or alternatively/simultaneously, deposit a polymer often used for sidewall protection or for microfluidics coatings (e.g., CF8). In a reactive process, there also exists a chemical reaction between the process gas (e.g., SF6) and the material to be etched. Using two RF generators, one can control ion density and ion incident energy independently of one another.
- The system operates with high voltages that can cause shock, burns, or death. Never open panels or remove covers from the system.
- The system produces electromagnetic radiation from audio to 2.45 GHz frequencies, which can have field strength strong enough to cause death or injury if not properly shielded. Never remove covers or protective shielding.
- The system contains compressed gases including fluorine compounds that can leave toxic residues in the system. Use appropriate caution with gases, never defeat interlocks or try to fix equipment problems, and never open the main chamber (Chamber 1).
- Etched materials or their byproducts may be toxic. Never open the chamber without proper pre-cleaning and appropriate personal protective equipment and training.
- The system uses liquid nitrogen (LN2) to cool the sample. Direct skin contact with liquid nitrogen or the plumbing carrying it can cause frostbite. Never tamper with the tank blow-off valves or other LN2 safety features. This could result in over-pressurization and catastrophic or explosive tank failure. A massive LN2 leak constitutes an asphyxiation hazard; evacuate the lab. Please check the LN2 dewar pressure before running any processes.
- The system has a substrate heater that can operate at very high temperatures, capable of causing burns on contact. Use care when operating the heated stage to avoid contact with any hot areas. The chamber walls are also heated to 60 C.
- Do not vent the main chamber. Only press “Evacuate,” “Stop,” and “Vent” on the load lock controls on the left side of the System, Pumping window.
- In case of immediate electrical, chemical, or physical danger, utilize the red EMO button situated on the front of the equipment.
- Si DRIE (Bosch/DSi, etc.), Si mixed, silicon dioxides, silicon nitrides, and various polymers.
- Discuss new material with the lab manager.
- Cryogenic Si etching
- Metal etching (W, Mo, etc.)
- Metal hard masks (Al, Cr, Ni, etc.)
- III-V etching
- Let the lab manager know three days in advance of your reservation to make sure we have sufficient LN2.
- Do not ever press the STOP ALL AUTO PROCESSES button in the upper right side of the screen. If you do press it by accident, carefully read the message, and then press No to avoid shutting the system down.
- Do not ever enter service mode. If you do enter service mode by accident, do not press any valves. Press System and then Exit Service. Read the message and click Ok to exit service mode. There is no real DANGER!!! despite the daunting message.
- Be careful not to hit the EMO button accidentally on the front of the tool.
- Do not ever run process steps with IGNORE TOLERANCE
- If you are running long switched processes, for example a DSi (Deep Silicon)/DRIE (Deep Reactive Ion Etch) etch, make sure to monitor the process regularly for a temperature change and to make sure the plasma is still on and the correct color. The switching process is too fast for any tolerance errors to show up. If the plasma is not lit, stop the process and return the wafer to the load lock.
- When loading recipes or changing modes, e.g. from Automatic to Manual or vice versa, you may be prompted to save or overwrite a recipe. Overwriting is always ok while saving is generally not, because the previous user may have made edits to standard MMF processes.
- Do not click on the pumps on the system screen. This will turn off the pumps without any notification.
- For short etches or switched recipes, try to set a log interval for each step that makes sense. For example, for 10 s etches, you might want a log interval of 1 s. For 1 hr etches, maybe every 30 s is sufficient.
- Check reservations and make one.
- Equipment checks. (Note: you may need to press OK on the pop-up window that reads
“Process Completed OK,” and accept a “YELLOW ALERT” that says, “End of process reached.”)
- Press System then Pumping. Ensure there are no red alerts present, and that all the interlocks on the very bottom to the right “Sys” are green except for the Gas-Pod Interlock. It is normal for this to be red before starting a process.
- Check base pressure. Check that the penning gauge on the process chamber reads less than 5.0e-6 Torr. If the tool has been used recently, the pressure may be higher. This is acceptable if the pressure is decreasing. If the pressure is above 5.0e-6 Torr and is not decreasing, leave a note that the tool is inoperable and report the issue to staff.
- Check the CM gauge. Press Process, Chamber1. The CM gauge reading, shown in the APC CONTROLLER box (“Chamber Pressure”) on the Chamber1 screen, should be 0.1 mTorr while the system is at base pressure. If the CM reads 0.0 mTorr or reads >0.3 mTorr, report the issue to staff. If you have critical processes with steps operating at pressures less than 10 mTorr, wait for the tool owner to adjust the CM gauge back to 0.1 mTorr before continuing.
- Take the Eurotherm 2404 controller out of manual mode by pressing the left circular button and verifying that the AUTO LED lights up. The OP2 light will turn on if the actual temperature (top reading) is above the setpoint (lower reading).
- Turn on the liquid nitrogen in the maintenance area. Check the gauge in the center on the top of the tank to ensure that greater than a quarter of a tank of LN2 remains. The pressure should be ____ These gauges are notoriously inaccurate, so proceed with caution and expect that the level might be lower than it appears. If the level is less than one quarter, inform staff and make a conscious decision about whether to proceed with your samples.
- Set the stage temperature using the software. Press Process and then Recipes. You may need to set the operating mode to Manual and No Wafer by clicking both buttons (verify that the dots next to Manual and No Wafter are yellow) and then select No when the prompt asks “Do you wish to save current Recipe?”. Press Do not save previous recipes, but you may need to acknowledge that you are overwriting a previous recipe by clicking Yes when a pop up appears. Select the “System – Set Temp” recipe and press. Edit the chuck temperature by left clicking the only step in the recipe, then selecting EditStep, changing the temperature in the CRYO box to the desired temperature, and pressing Ok. Once back on the Process, Recipes screen, click Run. Read and accept the yellow alert that says End of process reached, and then check that the new set point on the Eurotherm 2404 is correct.
- Confirm that the chuck temperature is approaching the setpoint.
- Load a dummy wafer or monitor wafer. Typically, a dummy wafer is left in the load
lock. Check that it is resting snugly against the cams with the flat facing away from the process chamber. If there is no wafer present, you will need to load one following the instructions
below.
- Unloading and loading wafers. Press System then Pumping. Then, on the left-hand side loadlock controls, (note: never vent the process chamber!) press Stop, read and accept the pop-up message, and press Vent. When the load lock vents, open the lid and load a wafer snugly against the cams with the flat away from the chamber. Close the lid, press Stop and then Evacuate on the load lock controls, provide a wafer name, and press Wait for the load lock to report “Cycling Loadlock Pumping” and process chamber to report “Base Pressure Reached” before beginning a process.
- Run “MMF – O2 Clean XXC”. Press Process then Set the operating mode to Automatic and click No when the prompt asks, “Do you wish to save current Recipe.” Make sure a dummy wafer is in place and that it is intimately seated with the cams. Load and run the clean recipe with the temperature matching that of the etch you plan to use. If you can’t find the right temperature, edit the temperature in each step of a similar recipe before running it. (Note: do not save the recipe with the edited temperatures.) Verify that the chamber is clean by monitoring the plasma color (generally: dim, slight purple = clean, bright whitish-blue = dirty). If the plasma is dim, it is ok to stop the recipe and return the wafer to the load lock. When the process is over, read and accept the pop-up messages.
- Run conditioning recipe (Optional). Press Process, then Recipes. Select Automatic for the operating mode (note: do not save over a recipe unless it is YOUR recipe). Then select and run your recipe. Operating in Automatic mode, the tool will load the wafer, run the recipe, and unload the wafer automatically.
- Run process. Follow the steps in 4a to unload the dummy wafer, load your wafer, and evacuate the loadlock. Enter a wafer ID. The system will report “Cycling Loadlock Pumping” and “Base Pressure Reached” when the loadlock and process chamber are ready to process. Next, in the Process, Recipes screen, verify the tool is in Automatic mode, load your recipe, edit your etch time or Repeat number, and run your recipe. Verify that the wafer loads, the plasma strikes, and the reflected powers for the ICP and RF supplies are less than 10 W. Verify that the helium backing pressure and flow are normal for your etch (typically 7 Torr or 10 Torr and <5 sccm). Verify that the chuck is at the proper temperature and monitor the temperature during the run. If the temperature increases by more than two degrees, the liquid nitrogen may be out. Monitor and record all parameters to help with troubleshooting and process development. After the process, acknowledge the Yellow Alert indicating the process has finished and press OK if the Process Status window says Process Completed OK. The tool will automatically transfer your wafer to the load lock after processing.
- Unload wafer. Confirm that the chamber is at base pressure and loadlock has reached “Cycling Loadlock Pumping” before proceeding. Press Stop and then Vent on the loadlock controls. Wait for the loadlock to vent, remove your wafer, and replace the dummy wafer. Evacuate the loadlock by pressing Stop and Evacuate on the loadlock controls, and enter “dummy” for the name.
- Run clean recipe. A chamber clean is required for etches containing fluorocarbons. Run an automatic recipe with “MMF – O2 Clean XX C.” For most processes, a 5-minute clean is sufficient. For specific processes containing C4F8 (e.g. MMF - SiO2 Etch or MMF – CxFy Deposition), work with the lab manager to establish an appropriate cleaning procedure.
- Close the liquid nitrogen valve on the tank by turning it clockwise. Use caution; the knob may be very cold.
- Press the AUTO/MAN button on the Eurotherm controller. Make sure the MAN LED is on, that the set point reads 0.0 by pressing the up and down arrows, and that OP1 and OP2 are not
- A Red Alert is shown on the screen.
- If you tried to run a clean and it didn’t strike or during your periodic check during a clean, you see a Red Alert window saying, “Forward Power Out of Tolerance,” or, “Auxiliary Reflected Power Our of Tolerance,” accept the message and try restarting the clean a second time. If it fails a second time, shut the tool down in CORAL and note in CORAL how much time is left on your chamber clean.
- Otherwise, shut the tool down.
- Message reads “Do you wish to run a second process on the wafer in the loadlock?”
- Make sure the wafer is still in intimate contact with the cams.
- If it is a dummy wafer, go ahead! If it is a product wafer, make sure you haven’t accidentally tried to run a second time.
- You try to start a process in Manual Mode with no wafer in the chamber and you get
the message, “There is no wafer in Process Chamber unable to start process”.
- Clear the message and click “No Wafer” on the upper left of the Process Recipes screen.
- You had to stop a process in the middle of a run using the STOP button below Process
Control, and a pop up reads, “All processes attached to this Recipe Task have been
stopped manually. Do you wish wafers to be automatically returned to Loadlock?”
- Press Yes to return wafer to loadlock. Read and accept the pop up message.
- A message window “Process Status” pops up and says “Process Failed”. Press OK.
- Temperature is increasing during process.
- Stop process using the stop square on the upper left side of the screen. A message
should pop up saying, “All processes attached to this Recipe Task have been stopped
manually. Do you wish wafers to be automatically returned to Loadlock?” Press Yes. Check LN2 level. Ask staff to replace LN2 if you are not qualified to do so.
- Note: if process temperature gets too high, wafers can stick to clamp ring and not properly leave the load lock. If this happens, see wafer transfer failure section.
- You accidentally clicked into service mode.
- Do not press any other buttons. Click “System” and “Exit Service”. Read the DANGER message, and press “Ok” to exit service mode.
- Software is not logged in and does not say “Manager” at the top of the screen.
- Normally the software will be open logged in (“Manager” is displayed at the center top of the software). If necessary, login to the software. Press System then Password. Then enter OPT and OPTfor the username and password.
- You get a PROCESS FAILED message when trying to return the wafer to the load lock
- Contact MMF staff. Resolving this issue requires you to go into service mode.
- Stop process using the stop square on the upper left side of the screen. A message
should pop up saying, “All processes attached to this Recipe Task have been stopped
manually. Do you wish wafers to be automatically returned to Loadlock?” Press Yes. Check LN2 level. Ask staff to replace LN2 if you are not qualified to do so.