Solvent/Headway Spinner Bench

Description
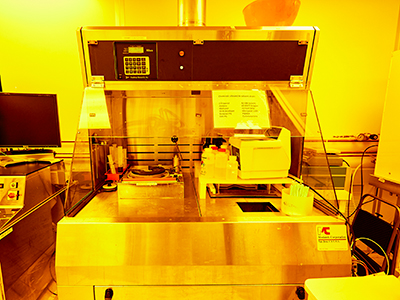
Headway PR spinner & solvent bench.
Operating Manual
*Note that the instructions below may not contain the most recent updates. Please refer to the manuals printed and posted at the equipment.
- Use eye protection! This spinner can be used without a lid and substrates could be ejected from the bowl.
- Do not extend your head beyond the sash. During cleaning, bring the individual components to you rather than going into the hood.
- Be sure to include a deceleration step at the end of every recipe. Be sure the deceleration step has a time (suggestion = 1.0 sec) otherwise the controller will skip the step. The Headway spinner will abruptly stop without a programmed deceleration.
- The time entered in step is the time the spinner is held at the entered spin speed; this time does not include any acceleration time.
- Do not exceed 5500 rpm without consulting staff.
- Clean up properly. Improper cleaning will lead to access restrictions.
- The bench SPIN5-Headway houses a Headway spinner used for general spinning. Most materials can be spun in this spinner, but only with approval from staff. Typical approved material includes SU-8, PDMS, and polyimide. Please contact MMF staff if you would like to use a new material.
- Chucks are available for pieces up to 100 mm wafers.
- For use with stocked AZ and Futurrex resistors, SU-8, PDMS, polyimide, KMPR, spin on glass and spin on dopants.
- Staff must specifically approve any other materials.
- Do not get acetone on the spindle, chuck O-ring, or controller.
- Do not use wafers that have been etched through, even if the vacuum holds.
- Record your time in the logbook-sign into SUMS if necessary
- Verify the Bowl is assembled properly – The cleaning procedure requires users to disassemble
the bowl and shielding. The proper order is from the ground up:
- 1) “Base bowl with two drains (not to be removed).
- 2) Drain tile which has holes along the circumference for drainage.
- 3) Headway panel which has four pins that mount into the spinner frame.
- 4) Teflon shield which is designed to drain resist towards the drain tile.
- Turn Controller on – The controller should always be left on. Be sure the display reads “READY”, if not cancel the current recipe by hitting the red button on the large spinner switch (the footpedal next to the controller). The vacuum reading in the left-hand column should read “AU” for automatic.
- Line with tin foil – Line the bowl with aluminum/tin foil to keep the bowl clean.
- Select chuck – Chose the appropriate chuck size and load it on the spindle. There is a flat spindle that matches to the chuck. Make sure to use an O-ring.
- Load wafer – Center your wafer on the chuck using the outer diameter of the chuck. Slightly offset
wafers do not cause significant problems.
- Auto loading the wafer can be accomplished by swinging the arm with the black wafer holder properly into position. The white toggle switch can then press “up” which will raise the wafer chuck up around an inch. The swing arm can then be moved back into the safe position and the white toggle switch can be pressed “down.” After the wafer is lowered into the spin chamber move the toggle to the neutral position. The wafer can be removed in the reverse order.
Special Note: Upon loading the wafer there will not be any vacuum. When the controller is in automatic mode the vacuum is not applied until a spin recipe is started. If vacuum is necessary prior to spinning, you can press the Vacuum On/Auto button on the controller to apply vacuum.
- Choose a Recipe – On the controller press ‘RECIPE’, the controller will prompt you to enter a number. Recipes can be reserved in the logbook, users are free to edit recipes 5-9. Once a number is selected you should see that number displayed in the left-hand column next to “Recipe”. If you need to edit a recipe continue, otherwise skip to step
- Delete a Recipe – Recipes are best written from scratch, as such a recipe will have to be deleted. To delete a recipe press ‘RECIPE’ and the ‘CLEAR’. Next, select the recipe number you wish to delete. Now the numbers next to RECIPE and STEP should read 0.
- Editing Steps – Be sure that you have selected the recipe you wish to edit by noting the left-hand column. Next to “Step” you should see something like “-- 2”. The dash separates the current step and total steps in the recipe. “--2” means that you have no selected step in a 2-step recipe. (If you just deleted a recipe it will have 1 step).
- Select Step to edit – Press “Step”. The controller will prompt you for the appropriate step number.
- Enter Spin speed – Press “Speed/Ramp”. The controller will prompt you to enter the spin speed in rpm. Enter the value and press “Enter”.
- Enter Ramp rate – Press “Speed/Ramp” again. This time the controller will prompt you for the ramp rate in rpm/s. Enter the value and press “Enter”
- Enter the Step time/duration – Press “Step Terminate”. The controller will prompt you for a time in seconds. Enter
the value and press “Enter”.
Note: If a step has a time setpoint of zero, the step will be completely skipped within the recipe. - Exit the step editor – When finished with current step, you can move on to the next step in your recipe by pressing Step again and editing the speed, ramp, and duration. If you are finished will all steps in a recipe, press “Step” and enter “0” (zero) to end the recipe. This will return you to the main screen.
- Run the Recipe – After loading your recipe and applying photoresist, press the black start button. The system will apply vacuum to the chuck and wait for the vacuum to reach the setpoint before continuing. The spinner will run the full recipe, stop, and release the chuck vacuum when finished. Use the red pedal for emergency stop.
- Remove Wafer – Verify that the vacuum setting is in automatic (“AU”) and that the vacuum is released.
- Parts to clean – The spinner should be thoroughly cleaned of all materials that were spun, please use
the appropriate solvent. Recommendation is to bring the removable parts to the solvent
beach as it is easier to clean there. The critical parts to be clean are:
- The chuck (removable)
- The Teflon shield (removable)
- The top panel with the Headway logo on it (removable)
- The drain tile with the holes along the circumference of the bowl (removable)
- Bottom drain (non-removable)
- Re-assemble – Put any removed parts back as found; refer to Fig. 1 if needed.
- Logout – Record your time in the logbook.
- Auto wafer load will not work
- Try alternative chuck, several of the loading chucks have a bent center pin which prevents them from lowering.
- Starburst pattern
- Check that there is not an open hole above the wafer.
- Spin will not start
- Check for the “C’ and “V” on the screen to indicate that the vacuum is good and that the lid is closed.
- Vacuum error
- Is the HouseVac on?
- Make sure there is an O-ring on the chuck.
- How strong of a vacuum can you feel on the wafer when manually turned on?
- Trace the Vacuum pump lines.